


|
|
|
|
Kawasaki Concours 1400
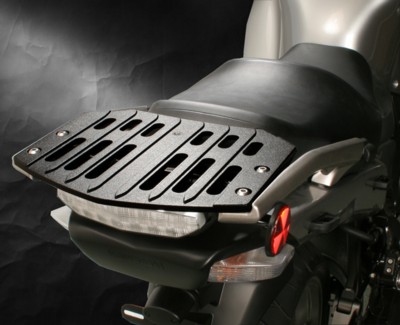
Stealth Backrest Install |
Step 1 : Factory Rack Removal and Stealth Rack Install If you can NOT get the spacers to drop into place and/or get the other two bolts started.. we've kinda figured that out.. I'll explain this fix in the next step.. Time for another beer... When you are done and the empty can as been efficiently placed in a recycle bin ....Proceed to the next step.. |
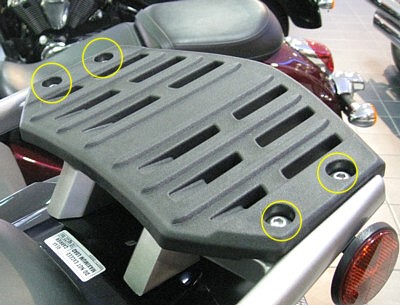 |
Step 2: Alignment and Adjustment Technique We have discovered that on some Kawasaki Concours 1400's the rear bracketry might be slightly out of alignment from the factory making it difficult for the customer to get the spacers in and the 4 screws started to install his new aluminum Stealth rack. Here's the solution... |
 |
|
Seat Removal: At some point you may need to remove your seat while the Stealth rack is in place.The Stealth rack was designed so that the stock seat can be removed and installed without drama. The clearance is there if you are using the proper seat removal technique. If you are having troubles removing your stock seat.. Here's the way we do it. The front of the seat has "hooks" that require the seat to be slid to the rear, but if one unlatches the rear of the seat, slides to the rear then forward while lifting the rear of the seat, it will clear the rack. Also, the seat pan is flexible, and one hand holding down the center of the seat lets if flex and helps the rear to clear. Here's another tip.. If you have difficulty removing the seat, first release the seat latch with the key, stand behind the bike and push the seat forward as you raise the rear of the seat clear of the rack. Take advantage of the flexibility in the seat pan to bend the seat as the rear is raised. Aftermarket Seats: There are a lot of aftermarket seats out there for the Kawi Concours 1400 and our design may or may not be accommodating for seat removal with every brand seat. On some aftermarket seats it may be necessary to remove our rack (taking all of 2 minutes) in order to remove your seat.. There's absolutely nothing we can do about this. Just making you aware. As of this writing we have heard that our rack is compatible with the HT Moto Seat. We'll update with seat compatibility info as we get access to different brand seats. Warranty: Pirates' Lair will replace the Stealth bracket and/or slide bar assembly FREE of CHARGE for a period of TWO YEARS from date of purchase should your bracket break. We will also warranty the upholstery portion for ONE YEAR. No need to keep your receipt. We'll have you on file. Just contact me via email or phone at 828.628.7093EST if you encounter any problems. |
 |
| Disclaimer: Please be advised that the backrest you are agreeing to install and use on your Kawasaki Concours 1400 has not been tested under EVERY conceivable condition. Every effort has been made to design a sturdy and durable product, but at this time.. there are numerous "real-world" variables that may or may not cause possible injury to passenger or rider or both. Please be aware that you are hereby forewarned as to these "variables" and by proceeding with the installation of said backrest, you are in effect waiving all legal recourse /rights in the event of accident caused by.. or damage inflicted upon..or contributed to... by the Stealth backrest. In no case will Jerry (a.k.a. Pirate) Finley, Pirates' Lair or any other of the contributing participants be held liable for injury or damage (consequential or otherwise) resulting from or arising out of usage of the Stealth backrest by you or your passengers. The reader should recognize that motorcycling is a dangerous activity that can result in injury or death. You are hereby notified that, should you decide to proceed, you do so at your own risk. If you do NOT agree with all aspects of this disclaimer... please return the backrest and I'll gladly refund the entire purchase price (excluding shipping) |