
 |
|
Oil/ Filter
Change for the BMW K1200RS / 2002-05 K1200GT |
| Changing the oil on the K'ster
is a relatively easy job. A minimum of tools and brains are required and
actual "shop time" is under an hour even for the most mechanically
challenged. I'll leave it up to you to decide what type of oil to use. Personally,
I choose to stick with BMW brand oil due to warranty concerns. It may cost
pennies more, but if something does go wrong with my engine.. that's one
variable that can't be used against me.... and I've heard of this happening.
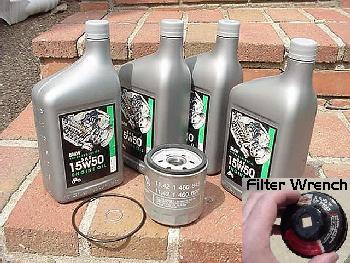
FYI..I used standard BMW oil until around 18K and then switched to BMW brand
full synthetic (pictured).
Most people don't realize that they don't have to pay their dealer or aftermarket supply houses $16 for an oil filter wrench. There are 2 cheaper alternatives that I know of. Auto Zone sells one called the Oil Filter Cap Wrench made by OEM (part# 25401) for about $3. also... there is a Volkswagen oil filter wrench (part# DFM Model 1003) that is around $6. Every little bit helps. |
|
You'll
need the following: |
 |
|
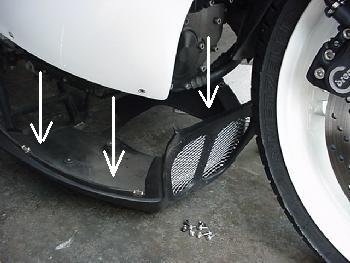
1. OK.. first thoroughly warm up your bike… a few loops around the block will suffice. Now put your bike on the centerstand and remove the lower cowling. On the 97-2001 models, there are (9) 3mm screws and (2) 4mm underneath. On the 2002, I think there are about 8 Torx screws. Not sure..never done an 02.. Note which length screws go in which holes. Set the screws aside. |
 |
|
2. Remove the oil filler cap on the right side of the bike..it screws out. Check rubber o-ring for wear. Generally... if it's not seeping.. it's good. It's now time to open your first beer. Sip slowly...or not.. be creative. |
 |
|
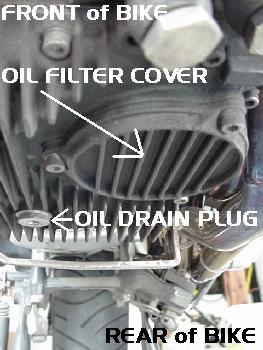
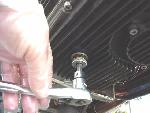
3. Place an oil pan underneath your bike. Have some rags handy as you'll need them sometime during this operation. Trust me. Now, using a 8mm hex, remove the drain plug and drain the oil until it's just barely dripping. Now, make sure your oil pan is properly positioned under both the drain hole AND the oil filter cover. Loosen the (3) 6mm bolts on the oil filter cover. More oil will come out of here. When the oil has stopped flowing, go ahead and remove the 3 filter cover screws.
4. Remove the oil filter and discard in an environmentally friendly way. It will be full of oil so try not to dump it all over you and/or the garage floor. Same thing goes when changing the oil in your car or truck. |
 |
|
5. At this point, I usually take a quart (or less) of any oil I have sitting around the garage and pour it into the engine. My theory is that if there is any lingering dirt/particles/coelacanth.. this will flush it out... Let drain for 1 hour... It's beer/bong/cleaning time. As it may be a while before you have your lower cowling off again.. take the time to clean up/polish the surrounding bits and pieces or take a few minutes and take the old oil to any oil change establishment for proper disposal. |
 |
|
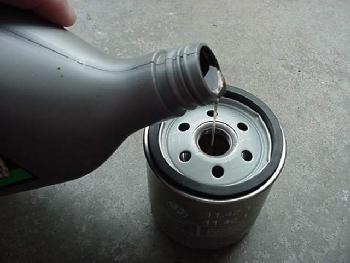
6. You back now.. relaxed? Good. Take a minute or two and thoroughly clean around the filter cavity area. You are ALMOST ready to install the new oil filter. First...open a quart of new oil and SLOWLY fill your new filter with it. The inside of the filter is very dense so let it soak in. This will help to get a proper reading upon start-up. The filter holds approximately 2oz. Also... wet the surrounding rubber lip of the new filter with clean oil. This will help the seal upon install. |
 |
|
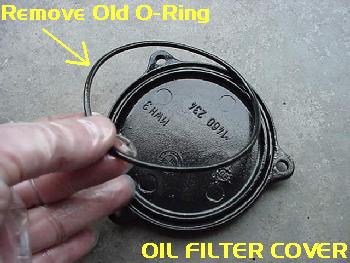
7. Install the new filter to 8.1 ft.lbs or 11Nm if you have a torque wrench handy. If not.. just use common sense. It should spin right into place. 8. Before you put the filter cover back on, now is the time to remove the old filter gasket from the cover and install the new one. Once the new rubber gasket is in place, wet it down with new oil and then replace the filter cover using the 3 screws. You'll notice that the fins on the filter cover run parallel with the fins on the underside of the engine. Cool, huh? Tighten to 7.4 ft lbs. or 10Nm |
 |
| 9. Remove and discard the old crush washer. Resist the temptation to re-use it. Put the new crush washer on the drain plug and re-install to 22.1 ft.lbs or 30Nm10. OK.. everything is in place. Take a rag and wipe any oil from around the filter cover, drain plug, and surrounding area. Why? Because after you get the oil in, before you replace the lower cowling, you are gonna start it up to check for leaks. if the area is clean to start with... any new oil will be from a leak..Duh! | 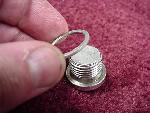 |
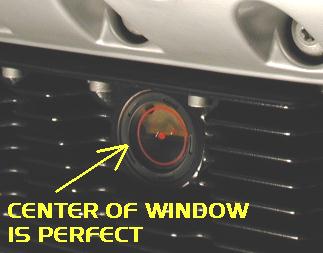
11.Add oil. My manual
says that you'll need 3.75 quarts with new filter, but mine has never held
that much. Without exception, mine seems to hit the mid-window viewing mark
at 3.5 quarts. FYI...I usually put 3 quarts in.. run it for a minute or
two and then add accordingly. 12. If you see no leaks... go ahead and put the lower cowling back on. Your about done. 13. Go for a short ride... re-check the oil.. adjust accordingly.. finish your 6 pack. Your done and you have the satisfaction of knowing you didn't help your dealer make his boat payment for this month. Mick Jagger was wrong... you can get satisfaction. |
 |