

|
|
|
K1200LT 4-Pot Caliper Install on K1200RS |
|
While the brakes on the BMW K1200RS are pretty damn good.. improvements can be made. Obliviously, better pads make a difference. Steel braided lines like the Spieglers will get rid of the sponginess that all the K's suffer from. Of course.. some of us are never satisfied with mediocrity.. hence this project. Be forewarned...I am NOT advocating this procedure. By installing the LT caliper you are giving up your rear ABS function. The bike will "think" it's working, but in an emergency situation.. the rear ABS will NOT kick in as the BMW engineers intended. So why would anyone want to do it? Main reason.. you will have better, more effective braking on a daily basis. The stopping power of the LT caliper is greater than the factory 2-pot by at least 30%. If you have to ask.....then you probably shouldn't try it. Note: This How-To is only partially complete. In order to reap the full benefits of the LT 4-pot caliper, a larger master cylinder is needed for my 98 model. Preferably off an LT or newer model K12 which has larger units. Without the m/c, you will have a longer travel in the pedal which isn't necessarily a bad thing but is different than what you might be used to. At this writing, I am still undecided as to if I will add the larger piece. |
|
You'll
need the following: Tools
Needed: |
 |
|
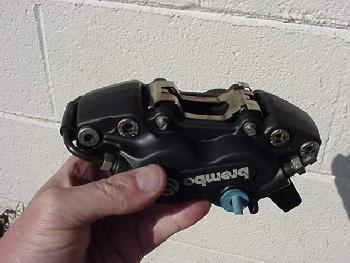
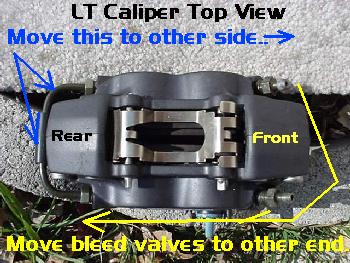
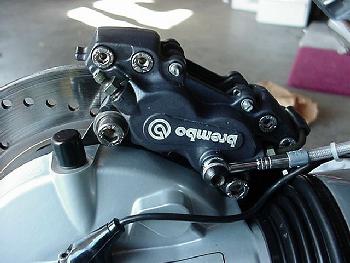
1. Before we start unbolting and draining fluids... first things first. You'll need to swap the LT's crossover rear tube to the other end of the caliper. You will also need to swap the (2) bleeder valves to the other end. The reason for this swap out is simple. In order to get a good bleed.. the bleed valves need to be at a higher point than the crossover tube. When the LT caliper is mounted on the LT, the front of the caliper (where the bleed valves are) is higher than the rear. When the LT caliper is mounted on the K1200RS the bleeds are on the low end so the swap is necessary to make them higher. |
 |
|
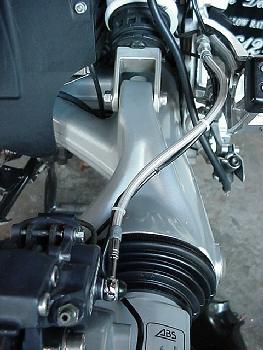
2. OK... Down to business. I guess you could try this with the exhaust canister and wheel in place, but it would be a bitch as one of the bleed valves in on the inside by the wheel.. I chose the easiest way. I removed both. Takes 2 minutes to get the can off. Then another 2 minutes to remove the rear wheel for a clean shot at the rear ABS sensor. And while you have the wheel and canister off and easy access to the rear area...you might want to take a minute or two to get in here and do some cleaning. |
 |
|
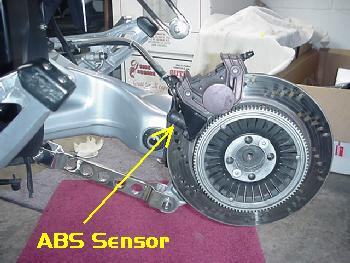
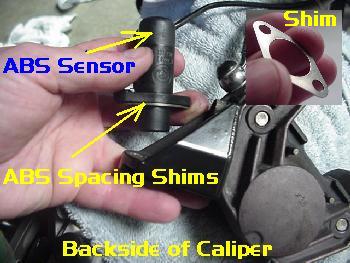
3. Now that you've got the left side of the bike readily accessible, find the factory mark on the ABS rotor. This is a small painted mark that was put on the rotor at the factory which shows the high point of rotor run-out. Roll the rotor around until it lines up with the ABS sensor. With a good thickness gauge, measure to get an idea what spacing you'll be shooting for after the new caliper install. ..The manual says you need .45mm-.55mm clearance. You'll need some ABS spacers when you install the LT caliper. I had to add a .4mm AND a .05mm to get the proper spacing. Cost from the dealer.. $3ea |
|
4. Now you can go ahead and remove the old caliper. First disconnect the brake line at the caliper and drain what little fluid that's in there into a receptacle. Cover up everything that could get fluid splashed on it. Some brake fluids can hurt the shaft casing finish. Remove the 2 bolts and lift off the brake caliper. 5. Now using a torx wrench.. remove the ABS sensor from the old caliper.. |
 |
|
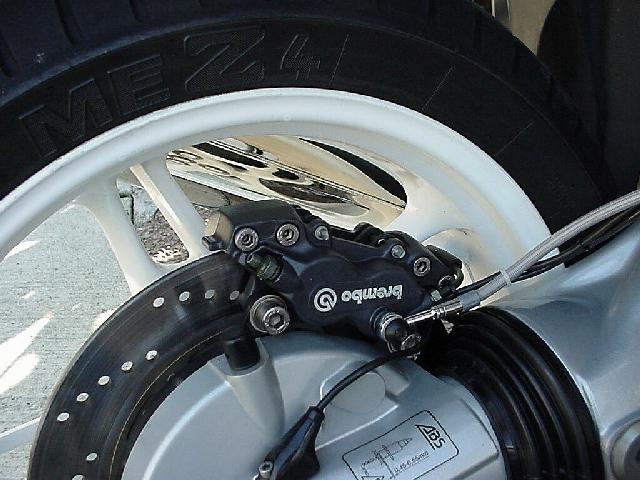
6. Go ahead and install the new caliper. You'll need a new, longer brake line. I had Spiegler cut me the line at 2" longer than stock. Cost around $40. It seems about 1/4" too long, but acceptable. I would recommend 1 3/4" longer than stock for a perfect length. 7. Now install the ABS sensor to the new caliper... add shim(s) until you get a .45-.55mm clearance. You are now ready for the tough part.. the bleed. You'll need to prep yourself with a beer or two..and a prayer couldn't hurt as this will be no run-o-the-mill bleed job. |
 |
|
8. While I have done over 100 bleed jobs in my sordid past, this was a brutally tough one due in no small part to the fact that the ABS cavity holds air bubbles. My usual bleed technique fell short. After spending a few hours on MY bleed attempt... I gave up. I ended up having my dealer use their suction tool to clear the line of air. Took him the better part of a day and I don't even want to put in print how much I had to pay him for shop time. Painfully expensive. Geez. If I had it to do over, I would have purchased my own professional bleed pump and saved myself some time and money. Live and learn. Bottom line.. the effort was worth it. Total cost was about twice what I had expected, but only due to the shop time needed for a good bleed. The mod was expensive, but even with the mechanic's fee it was still about half the price of an aftermarket 4-pot caliper. Yes, I gave up my rear ABS function, which I may use once or twice a year if at all, but I gained a superior rear brake which I'll use on a daily.. nay.. hourly basis. It also looks trick as hell as the new caliper is much sleeker.. less bulky. On to the next project....... Somebody stop me!! |
 |
 |