

|
|
|
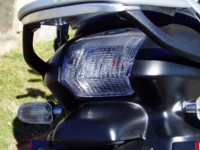
Clear Taillight Housing/BRAKE
LED Kit Install How-To |
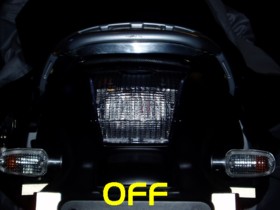
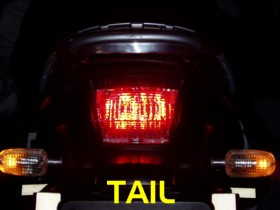
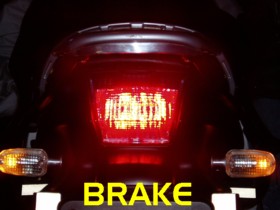
Yes.. by now everyone has seen the Clear Taillight Lens Kits from Clear Alternatives... While Clear Alternatives offers TWO versions of the KR1200RS tail light kit.. one with built in LED's.. the other without.. The question is.. Can I install my BRAKE LED Kit inside one of these non-LED clear housings? The answer is yes.. With just a minor modification necessary. Follow my instructions below and you'll be very pleased with the results. I was... Note from Pirates Lair: The Brake LED Kit from Gizmo Mill.. aka.. Road Rocketeer is no longer available. Those guys closed their doors in 2009 owing many people money and product.. including us. They appear from time to time on the www but do not be deceived. They are scammers. We urge our customers NOT to do business with them. They are criminals and without honor. |
| Parts/Materials Needed: (1) Non-LED Clear Taillight Housing Kit from Pirates' Lair @ $65.US (1) BRAKE LED Kit from Pirates' Lair @ $125.US (No Longer Available) (1) Dremel tool @ Cutoff wheel attachment (1) Philips screwdriver (1) Six pack (Imported beer only) |
 |
|
Step
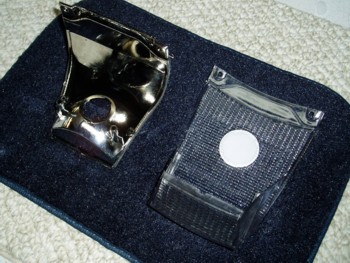
#1: Removing Factory Tail Light Remove the two phillips screws holding your Clear Taillight housing together and pull apart as shown. |
 |
|
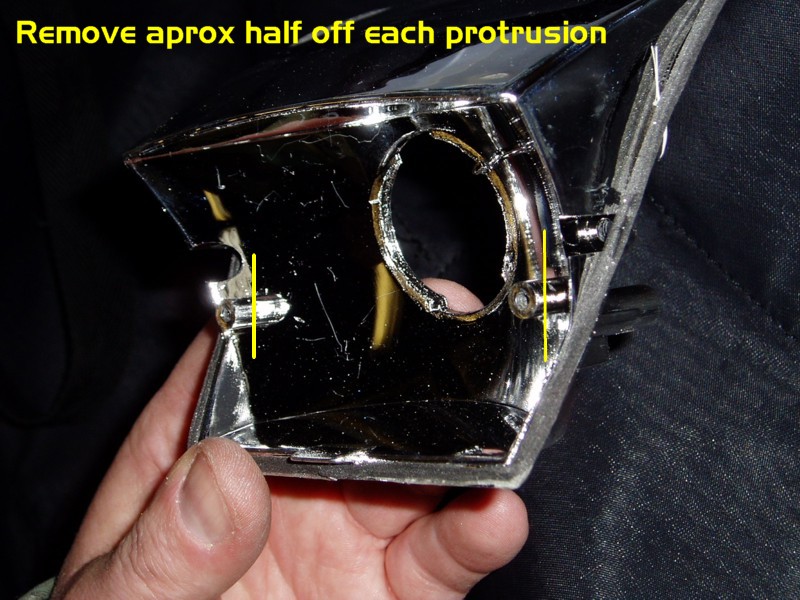
Step
#2: Modifying the Clear Housing You probably deserve
a beer right about now.. |
 |
|
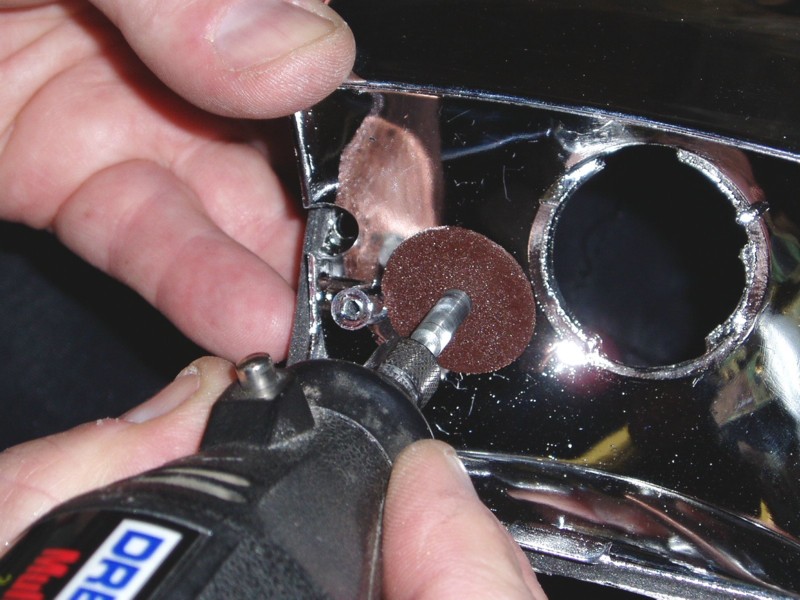
Step #3: Surgery The surgery is simple. First.. put down your beer and put on your safety glasses. Using your Dremel with a new heavy duty cutoff wheel # 420, trim off about 1/2 the length of both protrusions. Why only 1/2? Because the BRAKE LED circuit board will need a perfectly flat balanced surface and the remaining 1/2 will offer a mini-platform" for it to lay up against. That's why!! Any more questions? No?..Good.. Keep the cutoff wheel parallel to the part you are cutting as shown (pic right) I'd suggest it's now time time for beer #2.. you're almost done, but we don't want to get stressed out do we? |
 |
|
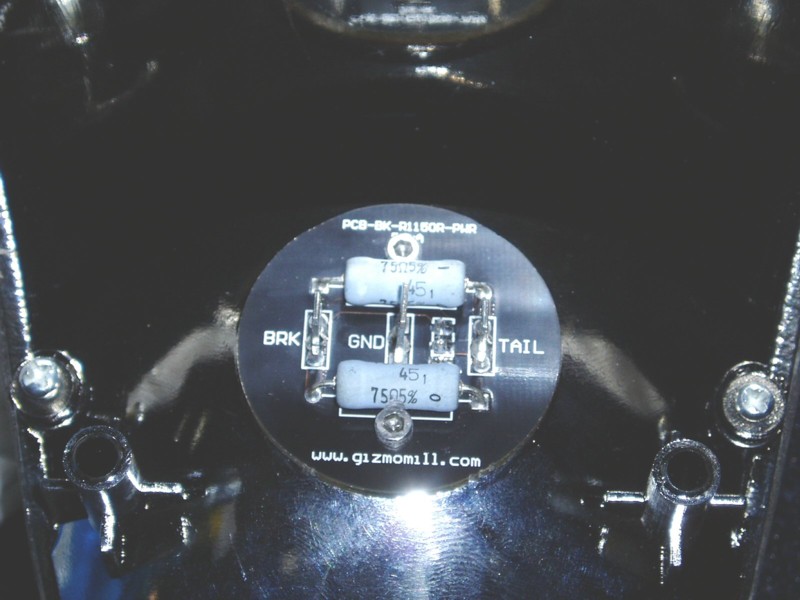
Step #4: Installing the BRAKE LED Device After you've trimmed the two protrusions, wipe all the smudges off the chrome housing and insert the BRAKE LED circuit board into position. Insert the 2 long screws that hold it together. Before you tighten them , make sure the LED display is centered like the pic to the right.. Once you get the LED's centered.. tighten ever so easily. For God's sake.. Use caution when tightening these two screws. If you'll pay close attention... just this once.. you'll realize that if you tighten them too much, you'll SNAP your circuit board in half and ruin your BRAKE LED Kit.. . NOT a good thing. All you need to do is tighten the screws until you see the board starting to bow ever so slightly.. The board is NOT going anywhere. If you screw up here.. you'll be cussing and regretting chugging those beers.. Geeezz Again... DO NOT OVER TIGHTEN THESE SCREWS!! One last tip for the anal.. Do you see the RED switch in the pic to the right? If I had it to do all over again, I'd have painted that WHITE before reassembly.. You can see it through the clear housing.. |
 |
|
Final Step #5: Reinstalling Wires and Reassemble Once you get the screws in, just reattach the 3 wires.. As you can see to the right.. the posts are clearly marked as to what wire goes where.. but to refresh your memory. Connect the BROWN
wire to the center post marked GND (Ground) BEFORE you reinstall the housing, turn on the key and make sure it's working properly.. If so.. Reinstall, sit back, and revel in your own magnificence. Just don't stare too long.. You'll see spots for an hour.. Trust me.. |
 |
 |
 |
 |